This website will tell you how to make and code your own bionic finger. You will learn how to construct a bionic finger out of certain materials as well as learning and understanding the code of an arduino. With these skills you can create a bionic finger that can mimic your very motions in real time.
Why do we need bionic limbs?
When a limb is amputated or lost, a prosthetic can be important for the everyday activities like wearing clothes, eating, walking or moving around that they may need to complete. It can also improve the mobility and allow them to be independent in doing their own activities. There have been many studies on the affect of bionic limbs on users. They each highlight the increased level of daily activities maintained when a prosthetic is used as well as psychological development.
Troubleshooting
Check that the flex sensor and microservo are attached to the board correctly.
Check that you are using the right Serial Port, it should be a usb port.
Check that the serial monitor is set to 9600 baud.
Check that you have selected the right type of arduino - it should be Arduino Nano.
Check the processor you are using. You can try use ATmega328P (Old Bootloader).
You will need:
Arduino Nano
3D printed finger parts
Battery Pack
Micro Servo
Flex-Sensor
Fisherman's Wire or string
Glove
Battery Pack and Battery
Wooden Board
Thin Sheet of Plastic
What do these components do?
The Arduino Nano is a programmable circuit board and a piece of software, that using a program on your computer you can create and upload code onto.
The 3D printed finger parts, thin sheets of plastic and the fisherman's wire/string together will be used to create the physical finger and allow it to move.
The battery pack will be able to power the finger without having it to be connected to a computer as a power source.
The micro servo is a piece of equipment that with the flex sensor will turn to certain angles. With the wire/string attached to it, it can move the finger.
The wooden board is only there as a mount for the finger.
The glove is used to glue the flex sensor to, this way it can be easier to use the finger.
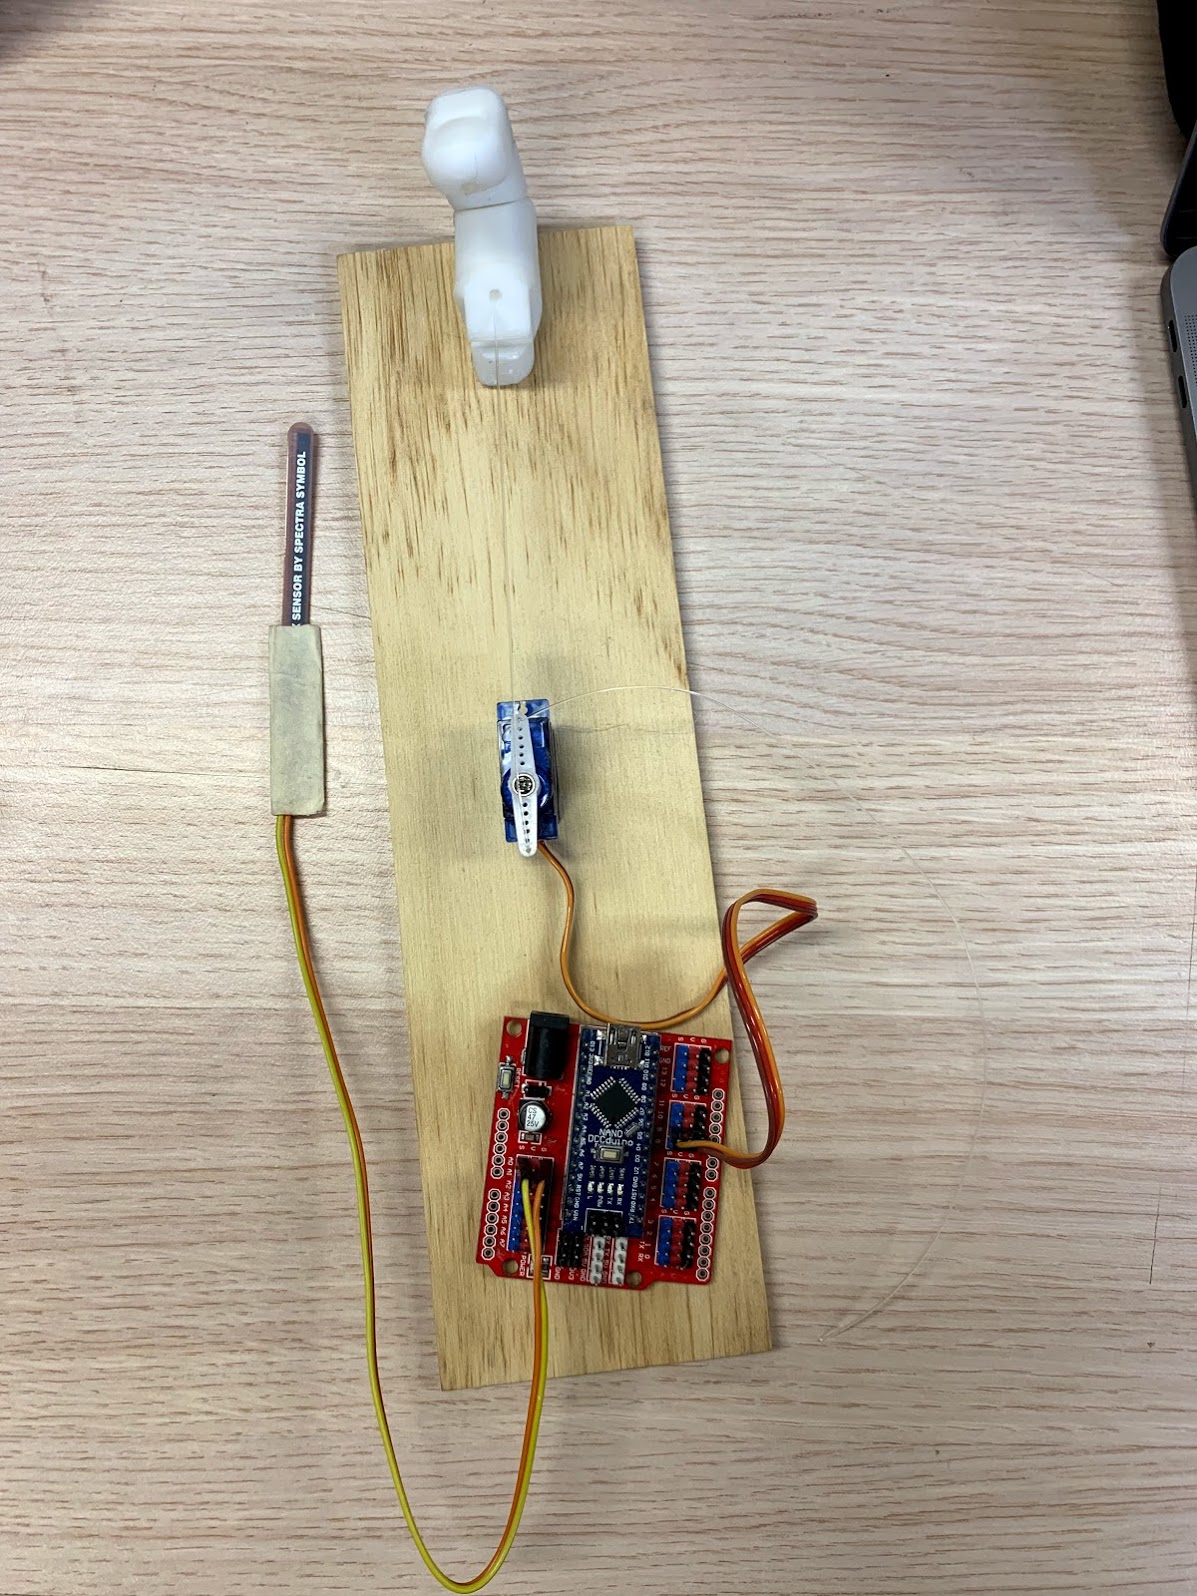
How to Assemble the Finger
Using the thin plastic strip, cut it into small pieces that can be slotted between two finger pieces whilst still allowing for space in order for it to
Using a hot glue gun, glue the finger parts together with the plastic strip.
With the fisherman's wire, thread it through the holes in the 3D printed parts. Tie a knot at the end, and pull at the wire to test the manoeuvrability of the finger. Ensure that there is still some left over after this at the tugging end of the wire.
After checking that the finger can bend like a human one will, glue it to a board.
With the end of the wire, thread it through the holes on the spinning motor of the microservo.
Once you have coded the finger and it moves if you have moved around your flexi sensor, glue the microservo to the board where the finger can still bend close and open.
In order for the finger to respond to movement and then move itself, you will need to upload lines of code into the arduino. Below there will also be a video explaining what the code performs.
Below is the code that you will need to upload to the arduino: